RHDS9 Migration to RHDS11 Lab
Contents
Summary⌗
Migrate a Red Hat Directory server database from RHDS9 to RHDS11. There are no plugins or certificates and no replication has been set up.
The export and import of data is done using the ldif2db and db2ldif tools.
Nodes are built as VMs on a libvirt host with 2GB of memory, a 60GB drive and 2vCPUs.
Setup VMs⌗
Setup consists of a RHEL6 VM running Red Hat Directory Server 9 and a RHEL8.3 VM running Red Hat Directory Server 11. All of this will be setup using a libvirt host.
| Hostname | IP Address | OS | RHDS |
|---|---|---|---|
| rhds9-single | 192.168.10.79 | RHEL 6.10 | RHDS 9 |
| rhds11-single | 192.168.10.200 | RHEL 8.3 | RHDS 11 |
Create Lab Network⌗
This will create a bridge interface (virtbr389) in the subnet 192.168.10.0/24. Also this will resolve nodes with the FQDN <node>.rhds.lab using libvirt’s dnsmasq.
<network>
  <name>rhds-lab</name>
  <bridge name="virbr389"/>
  <forward mode="nat"/>
  <domain name="rhds.lab"/>
  <ip address="192.168.10.1" netmask="255.255.255.0">
    <dhcp>
      <range start="192.168.10.10" end="192.168.10.249"/>
    </dhcp>
  </ip>
</network>
And now define it in libvirt:
# virsh net-define network.xml
Network rhds-lab defined from network.xml

# virsh net-start rhds-lab
Network rhds-lab started

# virsh net-autostart rhds-lab
Network rhds-lab marked as autostarted
Create RHDS9 VM (RHEL 6.10)⌗
- Create the RHDS9 VM qcow image
# qemu-img create -f qcow2 /var/lib/libvirt/images/rhds9-single.qcow2 60G
Formatting '/var/lib/libvirt/images/rhds9-single.qcow2', fmt=qcow2 cluster_size=65536 compression_type=zlib size=64424509440 lazy_refcounts=off refcount_bits=16
- Resize the RHEL6 base image /dev/sda1 (/) into the newly created drive
# virt-resize --expand /dev/sda1 \
  /var/lib/libvirt/images/iso/rhel-server-6.10-update-11-x86_64-kvm.qcow2 \
  /var/lib/libvirt/images/rhds9-single.qcow2
- Setup up the image with things like root password and hostname.
# virt-customize -a /var/lib/libvirt/images/rhds9-single.qcow2 \
  --root-password password:password \
  --uninstall cloud-init \
  --hostname rhds9-single.rhds.lab \
  --selinux-relabel
- Create the VM. Remove
--dry-runand--print-xmlin order to create the domain.
# virt-install --name rhds9-single.rhds.lab \
  --virt-type kvm \
  --memory 4096 \
  --vcpus 2 \
  --boot hd,menu=on \
  --disk path=/var/lib/libvirt/images/rhds9-single.qcow2,device=disk \
  --graphics spice \
  --os-type Linux \
  --os-variant rhel6.10 \
  --network network:rhds-lab \
  --noautoconsole \
  --dry-run \
  --print-xml
- Finally check the VM has started and confirm access is working.
# virsh list
 Id   Name                    State
---------------------------------------
 19   rhds9-single.rhds.lab   running

# virsh net-dhcp-leases rhds-lab
 Expiry Time           MAC address         Protocol   IP address         Hostname       Client ID or DUID
-----------------------------------------------------------------------------------------------------------
 2021-01-05 07:35:50   52:54:00:aa:a8:cd   ipv4       192.168.10.79/24   rhds9-single   -

# ssh 192.168.10.79
root@192.168.10.79 password:
Last login: Tue Jan  5 07:03:42 2021 from 192.168.10.1

# hostname
rhds9-single.rhds.lab
Create RHDS11 VM (RHEL 8.3)⌗
- Create the VM disk for RHDS11
# qemu-img create -f qcow2 /var/lib/libvirt/images/rhds11-single.qcow2 60G
- Expand /dev/sda3 (/) from the RHEL 8.3 base image into the new VM image
# virt-resize --expand /dev/sda3 \
  /var/lib/libvirt/images/iso/rhel-8.3-x86_64-kvm.qcow2 \
  /var/lib/libvirt/images/rhds11-single.qcow2
- Setup the image with things like root password and hostname.
# virt-customize -a /var/lib/libvirt/images/rhds11-single.qcow2 \
  --root-password password:password \
  --uninstall cloud-init \
  --hostname rhds11-single.rhds.lab \
  --selinux-relabel
- Setup the VM. Remove
--dry-runand--print-xmlin order to create the domain.
# virt-install --name rhds11-single.rhds.lab \
  --virt-type kvm \
  --memory 4096 \
  --vcpus 2 \
  --boot hd,menu=on \
  --disk path=/var/lib/libvirt/images/rhds11-single.qcow2,device=disk \
  --graphics spice \
  --os-type Linux \
  --os-variant rhel8.3 \
  --network network:rhds-lab \
  --noautoconsole \
  --dry-run \
  --print-xml
- Finally check the VM has started and confirm access is working.
# virsh list                                                                                                                            [0/5034]
 Id   Name                     State
----------------------------------------
 19   rhds9-single.rhds.lab    running
 24   rhds11-single.rhds.lab   running

# virsh net-dhcp-leases rhds-lab
 Expiry Time           MAC address         Protocol   IP address          Hostname        Client ID or DUID
----------------------------------------------------------------------------------------------------------------
 2021-01-05 08:24:44   52:54:00:aa:a8:cd   ipv4       192.168.10.79/24    rhds9-single    -
 2021-01-05 08:35:51   52:54:00:ea:42:d4   ipv4       192.168.10.200/24   rhds11-single   01:52:54:00:ea:42:d4

# ssh 192.168.10.200
root@192.168.10.200 password:
Activate the web console with: systemctl enable --now cockpit.socket

This system is not registered to Red Hat Insights. See https://cloud.redhat.com/
To register this system, run: insights-client --register

# hostname
rhds11-single.rhds.lab
Red Hat Directory Server Setup⌗
- Enable RHDS 9 repo, and install
redhat-ds
# subscription-manager repos --enable=rhel-server-6-rhds-9-rpms
Repository 'rhel-server-6-rhds-9-rpms' is enabled for this system.

# yum install redhat-ds
Setup RHDS 9⌗
- Update sysctl.conf and security limits and reboot the node
# echo "net.ipv4.tcp_keepalive_time = 300" >> /etc/sysctl.conf
# echo -e "* soft nofile 524288\n* hard nofile 524288" >> /etc/security/limits.conf
- Add the user and group for RHDS to run as
# groupadd dirsrv -g 389
# useradd -M -r -N dirsrv -g 389 -u 389
# id dirsrv
uid=389(dirsrv) gid=389(dirsrv) groups=389(dirsrv)
- Run
setup-ds-admin.plwith the default options, setting the service to now run as user dirsrv and group dirsrv. Admin and Directory Manager have the password set toldapadmin
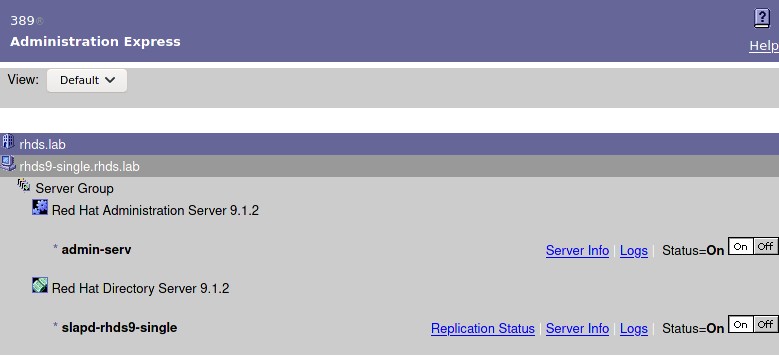
- At this point you should be able to login to the web admin interface with admin/ldapadmin on the server IP port 9830
Setup RHDS 11⌗
Enable the Red Hat Directory Server repo
# subscription-manager repos --enable=dirsrv-11-for-rhel-8-x86_64-rpms
Repository 'dirsrv-11-for-rhel-8-x86_64-rpms' is enabled for this system.
Install RHDS and its dependencies.
# yum module install redhat-ds:11
- Use the interactive installer to configure RHDS, using the suffix
dc=rhds,dc=laband Directory Manager password as ldapadmin again.
# dscreate interactive
Generate Test Data (RHDS9)⌗
389ds provides a tool to generate test data in an ldif format. Set the number of entries required before running.
# dbgen.pl -s 'dc=rhds,dc=lab' -n 100 -o ~/ldap_seed
Generating 100 entries, please wait
Progress: .
Generated 100 entries
- Once this has completed, use ldif2db to import the test data into RHDS.
Ensure the ldif file is readable by dirsrv (or the user running Directory Server. Also ensure selinux context is correct.
# /usr/lib64/dirsrv/slapd-rhds9-single/ldif2db.pl -s "dc=rhds,dc=lab" -i /etc/dirsrv/ldap_seed -D "cn=directory manager" -w -
Bind Password:
adding new entry "cn=import_2021_1_5_12_0_31, cn=import, cn=tasks, cn=config"
- Depending on how many entries are being added into Directory Server, it may be necessary to watch the the slapd log in order to see it complete
# tail -5l /var/log/dirsrv/slapd-rhds9-single/errors
[05/Jan/2021:12:00:33 -0500] - import userRoot: Indexing complete.  Post-processing...
[05/Jan/2021:12:00:33 -0500] - import userRoot: Generating numSubordinates complete.
[05/Jan/2021:12:00:33 -0500] - import userRoot: Flushing caches...
[05/Jan/2021:12:00:33 -0500] - import userRoot: Closing files...
[05/Jan/2021:12:00:33 -0500] - import userRoot: Import complete.  Processed 106 entries in 2 seconds. (53.00 entries/sec)
- When the import has completed, confirm that the entries are available via ldapsearch
# ldapsearch -D "cn=directory manager" -W -h localhost \
  -x -b "dc=rhds,dc=lab" | grep "^# num"
Enter LDAP Password:
# numResponses: 107
# numEntries: 106
- And select a random UID to help confirm the migration has gone OK.
# ldapsearch -D "cn=directory manager" -W -h localhost \
  -x -b "dc=rhds,dc=lab" -s sub -x "uid=DFouillar86"
# extended LDIF
#
# LDAPv3
# base <dc=rhds,dc=lab> with scope subtree
# filter: uid=DFouillar86
# requesting: ALL
#

# DFouillar86, Human Resources, rhds.lab
dn: uid=DFouillar86,ou=Human Resources,dc=rhds,dc=lab
objectClass: top
objectClass: person
objectClass: organizationalPerson
objectClass: inetOrgPerson
cn: Debbi Fouillard
sn: Fouillard
uid: DFouillar86
givenName: Debbi
description: 2;9654;CN=Red Hat CS 71GA Demo,O=Red Hat CS 71GA Demo,C=US;CN=RHCS Agent - admin01,UID=admin01,O=redhat,C=US [1] This is Debbi Fouillards description.
userPassword:: REZvdWlsbGFyODY=
departmentNumber: 4192
employeeType: Peon
homePhone: +1 818 894-6722
initials: D. F.
telephoneNumber: +1 206 939-4389
facsimileTelephoneNumber: +1 303 729-7287
mobile: +1 804 336-3999
pager: +1 510 194-4908
manager: cn=Ken Young
secretary: cn=Naima Savaryego
roomNumber: 7735
carLicense: DZNH3IQ
l: Denver
ou: Human Resources
mail: Debbi_Fouillard@rhds.lab
postalAddress: 227,  Dept #694, Room#Human Resources
title: Associate Human Resources Czar
userCertificate;binary:: MIIBvjCCASegAwIBAgIBAjANBgkqhkiG9w0BAQQFADAnMQ8wDQYDVQQDEwZjb25maWcxFDASBgNVBAMTC01NUiBDQSBDZXJ0MB4XDTAxMDQwNTE1NTEwNloXDTExMDcwNTE1NTEwNlowIzELMAkGA1UEChMCZnIxFDASBgNVBAMTC01NUiBTMSBDZXJ0MIGfMA0GCSqGSIb3DQEBAQUAA4GNADCBiQKBgQDNlmsKEaPD+o3mAUwmW4E40MPs7aiui1YhorST3KzVngMqe5PbObUHMeJN7CLbq9SjXvdB3y2AoVl/s5UkgGz8krmJ8ELfUCU95AQls321RwBdLRjioiQ3MGJiFjxwYRIVj1CUTuX1y8dC7BWvZ1/EB0yv0QDtp2oVMUeoK9/9sQIDAQABMA0GCSqGSIb3DQEBBAUAA4GBADevhxY6QyDMK3Mnr7vLGe/HWEZCObF+qEo2zWScGH0Q+dAmhkCCkNeHJoqGN4NWjTdnBcGaAr5Y85k1o/vOAMBsZePbYx4SrywL0b/OkOmQX+mQwieC2IQzvaBRyaNMh309vrF4w5kExReKfjR/gXpHiWQzGSxC5LeQG4k3IP34

# search result
search: 2
result: 0 Success

# numResponses: 2
# numEntries: 1
Migration⌗
Here we will migrate the test data between RHDS9 and RHDS11, using a test data set of 100,000 entries generated with RHDS9.
Pre Migration on RHDS11⌗
- Enable older schemas
# ldapmodify -D "cn=Directory Manager" -W -x
Enter LDAP Password:
dn: cn=config
changetype: modify
replace: nsslapd-enquote-sup-oc
nsslapd-enquote-sup-oc: on
- Add following parameter to
/etc/sysconfig/dirsrt-rhds11-single
LDAP_SCHEMA_ALLOW_QUOTED="on"
- Restart
dirsrv.target
Export Data from RHDS9⌗
- Export data from RHDS9 using the db2ldif tool
# /usr/lib64/dirsrv/slapd-rhds9-single/db2ldif -n userRoot -a /tmp/userRoot.ldif
Exported ldif file: /tmp/userRoot.ldif
- Copy the exported ldif file
/tmp/userRoot.ldifto the RHDS11 node.
Import into RHDS11⌗
Ensure exported ldif file can be read by
dirsrvuserInstall legacy tools for RHDS
# yum install 389-ds-base-legacy-tools-1.4.3.13
- Get the name of the running instance
# dsctl --list
slapd-rhds11-single
- Stop the Directory Server
# systemctl stop dirsrv@rhds11-single.service
- Import the ldif file using the ldif2db tool
# ldif2db -Z rhds11-single -i /var/lib/dirsrv/slapd-rhds11-single/ldif/userRoot.ldif -n userRoot
- Ensure the import has completed successfully
# tail -f /var/log/dirsrv/slapd-rhds11-single/errors
INFO - bdb_import_main - import userroot: Flushing caches...
INFO - bdb_import_main - import userroot: Closing files...
INFO - bdb_import_main - import userroot: Import complete.  Processed 100006 entries in 40 seconds. (2500.15 entries/sec)
- Once the import has completed, the Directory Server can be started again
# systemctl start dirsrv@rhds11-single.service
- Finally check the data is accessible from RHDS11
# ldapsearch -D "cn=directory manager" -W -h localhost \
  -x -b "dc=rhds,dc=lab" -s sub -x "uid=DFouillar86"
# extended LDIF
#
# LDAPv3
# base <dc=rhds,dc=lab> with scope subtree
# filter: uid=DFouillar86
# requesting: ALL
#

# DFouillar86, Human Resources, rhds.lab
dn: uid=DFouillar86,ou=Human Resources,dc=rhds,dc=lab
objectClass: top
objectClass: person
objectClass: organizationalPerson
objectClass: inetOrgPerson
cn: Debbi Fouillard
sn: Fouillard
uid: DFouillar86
givenName: Debbi
description: 2;9654;CN=Red Hat CS 71GA Demo,O=Red Hat CS 71GA Demo,C=US;CN=RHCS Agent - admin01,UID=admin01,O=redhat,C=US [1] This is Debbi Fouillards description.
departmentNumber: 4192
employeeType: Peon
homePhone: +1 818 894-6722
initials: D. F.
telephoneNumber: +1 206 939-4389
facsimileTelephoneNumber: +1 303 729-7287
mobile: +1 804 336-3999
pager: +1 510 194-4908
manager: cn=Ken Young
secretary: cn=Naima Savaryego
roomNumber: 7735
carLicense: DZNH3IQ
l: Denver
ou: Human Resources
mail: Debbi_Fouillard@rhds.lab
postalAddress: 227,  Dept #694, Room#Human Resources
title: Associate Human Resources Czar
userCertificate;binary:: MIIBvjCCASegAwIBAgIBAjANBgkqhkiG9w0BAQQFADAnMQ8wDQYDVQQDEwZjb25maWcxFDASBgNVBAMTC01NUiBDQSBDZXJ0MB4XDTAxMDQwNTE1NTEwNloXDTExMDcwNTE1NTEwNlowIzELMAkGA1UEChMCZnIxFDASBgNVBAMTC01NUiBTMSBDZXJ0MIGfMA0GCSqGSIb3DQEBAQUAA4GNADCBiQKBgQDNlmsKEaPD+o3mAUwmW4E40MPs7aiui1YhorST3KzVngMqe5PbObUHMeJN7CLbq9SjXvdB3y2AoVl/s5UkgGz8krmJ8ELfUCU95AQls321RwBdLRjioiQ3MGJiFjxwYRIVj1CUTuX1y8dC7BWvZ1/EB0yv0QDtp2oVMUeoK9/9sQIDAQABMA0GCSqGSIb3DQEBBAUAA4GBADevhxY6QyDMK3Mnr7vLGe/HWEZCObF+qEo2zWScGH0Q+dAmhkCCkNeHJoqGN4NWjTdnBcGaAr5Y85k1o/vOAMBsZePbYx4SrywL0b/OkOmQX+mQwieC2IQzvaBRyaNMh309vrF4w5kExReKfjR/gXpHiWQzGSxC5LeQG4k3IP34
userPassword:: e0NMRUFSfURGb3VpbGxhcjg2

# search result
search: 2
result: 0 Success

# numResponses: 2
# numEntries: 1
This should match the data seen in Generate Test Data section
Epilogue⌗
The migration succeeded without many issues and the data was available, however this is a very simple set up in regards to the data and the RHDS9 being freshly installed. As a theory exercise it works, but caution is advisable if attempting to do this with live data. Fortunately the roll back is simple as no data has been removed or modified on the RHDS9 node. It’s also worth noting that a direct upgrade from <10 to 11 is not a supported option.
Useful Links⌗
Cleanup⌗
- Remove the VMs and their associated drives
# virsh destroy rhds9-single.rhds.lab
Domain rhds9-single.rhds.lab destroyed

# virsh undefine rhds9-single.rhds.lab --remove-all-storage
Domain rhds9-single.rhds.lab has been undefined
Volume 'vda'(/var/lib/libvirt/images/rhds9-single.qcow2) removed.

# virsh destroy rhds11-single.rhds.lab
Domain rhds11-single.rhds.lab destroyed

# virsh undefine rhds11-single.rhds.lab --remove-all-storage
Domain rhds11-single.rhds.lab has been undefined
Volume 'vda'(/var/lib/libvirt/images/rhds11-single.qcow2) removed.

# virsh net-undefine rhds-lab
Network rhds-lab has been undefined